Halloween Party Menu 2014

This slideshow requires JavaScript.

These are some of the Un-Snooty favorites around this time of year.  These are all great things to serve at any fall or Halloween get-together, and if you’re headed to a fall potluck, take one of these with you and you’ll be a rockstar. Click the title to drop down the recipe! Photos coming soon.

Easiest Ever 3-Ingredient Pumpkin Cake

Cake:

  • 1 box spice cake mix
  • 2 eggs
  • 1 – 15 oz. can pureed pumpkin
  • 1 tsp. pumpkin pie spice

Frosting & Trimmings:

  • 1 can pre-made cream cheese frosting
  • Ground cinnamon
  • 1 cake cone (the kind you use for ice-cream)
  • Red, yellow, and green food coloring

DIRECTIONS:

  1. Preheat the oven to 350 degrees. Spray your bundt cake pan with baking spray, or grease with shortening or vegetable oil.
  2. Beat cake mix, pumpkin, and eggs together until well-mixed.
  3. Bake for 30-35 minutes, or until a toothpick comes out clean from one of the thick areas of the cake. Allow to cool completely before removing from the pan. Turn over onto a round serving plate.
  4. Add about 1/2 tsp. to the can of frosting, and then divide the frosting. 3/4 of it in one bowl, and 1/4 in another. Add enough red and yellow food coloring to the larger portion to create a “pumpkin” orange color. To the smaller portion, add green. This will be for the “stem.”
  5. Ice your cake with the orange frosting, and coat the outside of the ice-cream cone in green frosting. Then place it in the middle of the cake, creating the stem of the pumpkin. If you like, you can pipe “vines” onto the cake in green icing.

This cake is a huge hit at my house this time each year (Liz’s birthday is near Halloween, and this year, she specifically requested this cake as her birthday cake), and I promise you won’t be disappointed either. It’s awesomely moist and delicious, especially for how insanely stupid-easy it is to throw together. You don’t have to use a bundt pan or make it look like a pumpkin (just omit the food coloring and ice-cream cone), but if you don’t, you will need to adjust the baking time and watch the cake closely.  Note also that because there’s no oil, this cake is a little better on the waist than standard oil-in cake, and about 100x more moist!  Not only that, but it even looks like a pumpkin.  What’s not to like?

Best Roasted Pumpkin Seeds You’ll Ever Eat

INGREDIENTS:

  • 1-2 C. raw, peeled pumpkin/ sunflower seeds (buy them or DIY)
  • 2 tbs. Worcestershire sauce
  • Garlic powder
  • Onion powder
  • Paprika
  • Seasoned salt
  • Cayenne pepper
  • Extra-virgin olive oil
  • Cooking spray (optional)

DIRECTIONS:

  1. In a bowl, mix the seeds with the Worcestershire sauce and let them soak for about 10 minutes, until they’ve absorbed a good bit of the liquid. Stir them a few times in between.
  2. Coat with an even sprinkling of each of the dry ingredients before coating with a drizzle of E.V.O.O.
  3. Spread evenly onto a baking sheet that’s been covered with greased foil or parchment paper (un-greased) in a single layer.
  4. Bake for 10 minutes at 320, then take them out, give them a stir, and return to oven for another 3 minutes.
  5. Remove them and spread them in a single layer onto a double-layer of paper towels until they’re cool (that step is important).

This is my new recipe this year!  I’ve adapted and changed my pumpkin seed recipe lots of times, and this is the one that I’ve really come to love.  The big kicker?  Using peeled seeds.  It makes for a much quicker journey from bowl-to-stomach.  Also there’s no choking on the tough shell, and no spitting.  Just pure, simple enjoyment.  You can buy the seeds already peeled at some regular grocery stores and most every bulk food store, or if you’re up to the task, peel them yourself at home.  There are videos on this stuff on Youtube! Also, due to the last step of the process, these keep in a container incredibly well without getting stale or soggy.

Super Light-n-Fluffy Pumpkin Pie Dip

INGREDIENTS:

  • 1 – 15 oz. can pureed pumpkin
  • 1 – 8 oz. block cream cheese
  • 1/2 – 8 oz. container light Cool Whip
  • 1 – 4 oz. pkg. instant vanilla pudding mix
  • 1 1/2 C. milk
  • 1 tbs. ground cinnamon
  • 1 tsp. pumpkin pie spice
  • 1/4 C. sugar

DIRECTIONS:

  1. Whisk together milk, pudding mix, cinnamon, & pumpkin pie spice until smooth & thick.
  2. Beat into softened cream cheese with an electric mixer.
  3. Add all ingredients EXCEPT Cool Whip, continuing to beat together.
  4. Gently fold in Cool Whip, mixing thoroughly.
  5. Chill for 3 hours prior to serving.

This stuff is super delicious and pretty easy to throw together.  The best part is, it’s actually several recipes in one!  You can use it as a delicious filling for all kinds of pastries, cakes, and even cannoli, with a few simple additions (mix in some mini chocolate chips, then top the cannoli with powdered sugar and a drizzle of caramel!).  When serving it as a dip, serve it with apple slices, vanilla wafers, ginger snaps, and graham crackers.  You won’t be sorry.  To snooty it up a little, layer it in a trifle dish with sponge cake cubes and ginger snap crumbs.

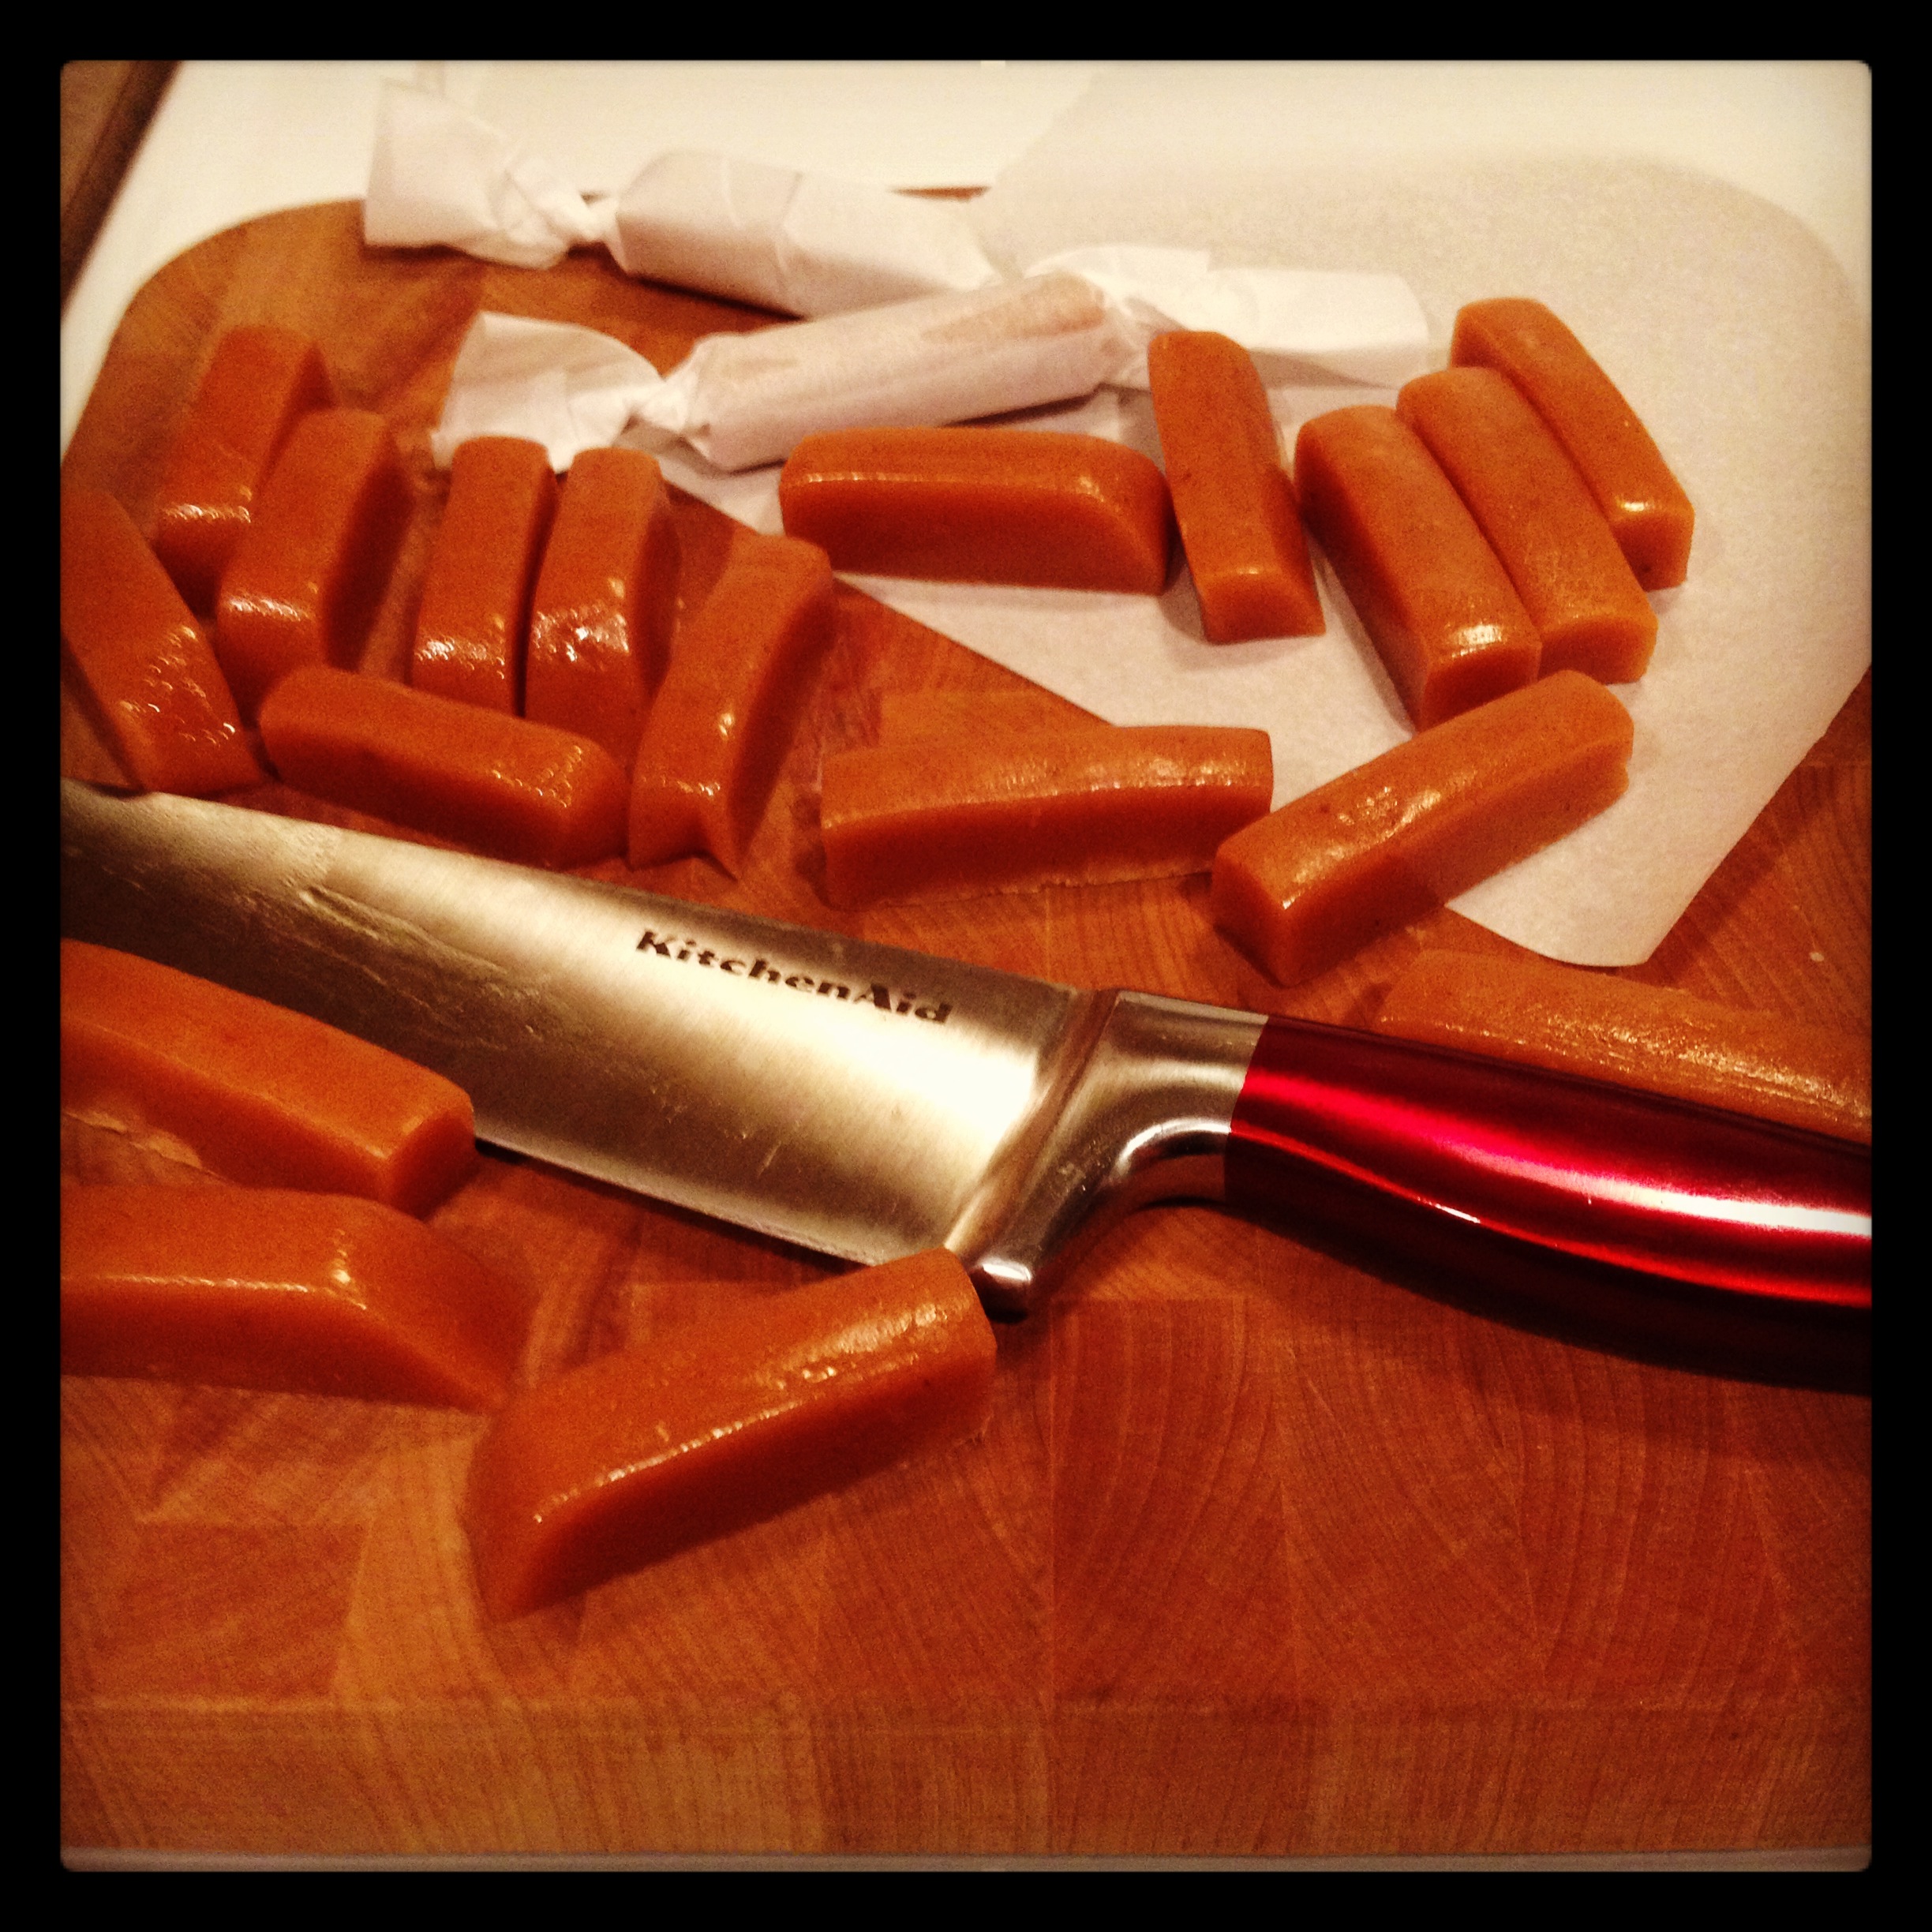
Awesomely Simple Caramel Apple Dip

INGREDIENTS:

  • 1 – 8 oz. pkg. cream cheese, softened
  • 1/4 C. brown sugar
  • Caramel topping
  • 2 – 3 large granny smith apples, sliced
  • lemon juice
  • Chopped nuts of choice (roasted peanuts, pecans, walnuts, or almonds)

DIRECTIONS:

  1. Cream together the cream cheese and brown sugar until there are no lumps. You can even add a pinch of cinnamon if you like, but totally not necessary.
  2. Spread it onto a serving plate or platter, leaving a 2″ border all the way around the edge.
  3. Toss all the slices of apple in a freezer bag with a couple tablespoons of lemon juice. Shake to coat.
  4. Arrange the apples around the outside edge of the plate in an overlapping pattern, refrigerating the rest of the apple in the bag for later.
  5. Over the cream cheese mixture, drizzle the caramel topping in whatever pattern you like (spiral, zig-zag, criss-cross, you know the drill), and sprinkle over with chopped nuts.

This recipe is an old standard, and has been in my family for years (and probably yours too!).  So quick and simple to put together, yet ridiculously delicious.  Where the “caramel topping” is concerned, you can certainly just go with whatever caramel ice-cream topping you can find. The other option is using the good stuff, Marzetti’s brand caramel apple dip, that comes in a tub. Heat it up a little bit in the microwave to pour over the top of your cream cheese mixture. Good stuff! If you serve this at a party, it will probably all be gone by the end, and you will probably get all kinds of complements, and people will probably ask for the recipe, and you will probably be a hero. Probably.  Just saying.

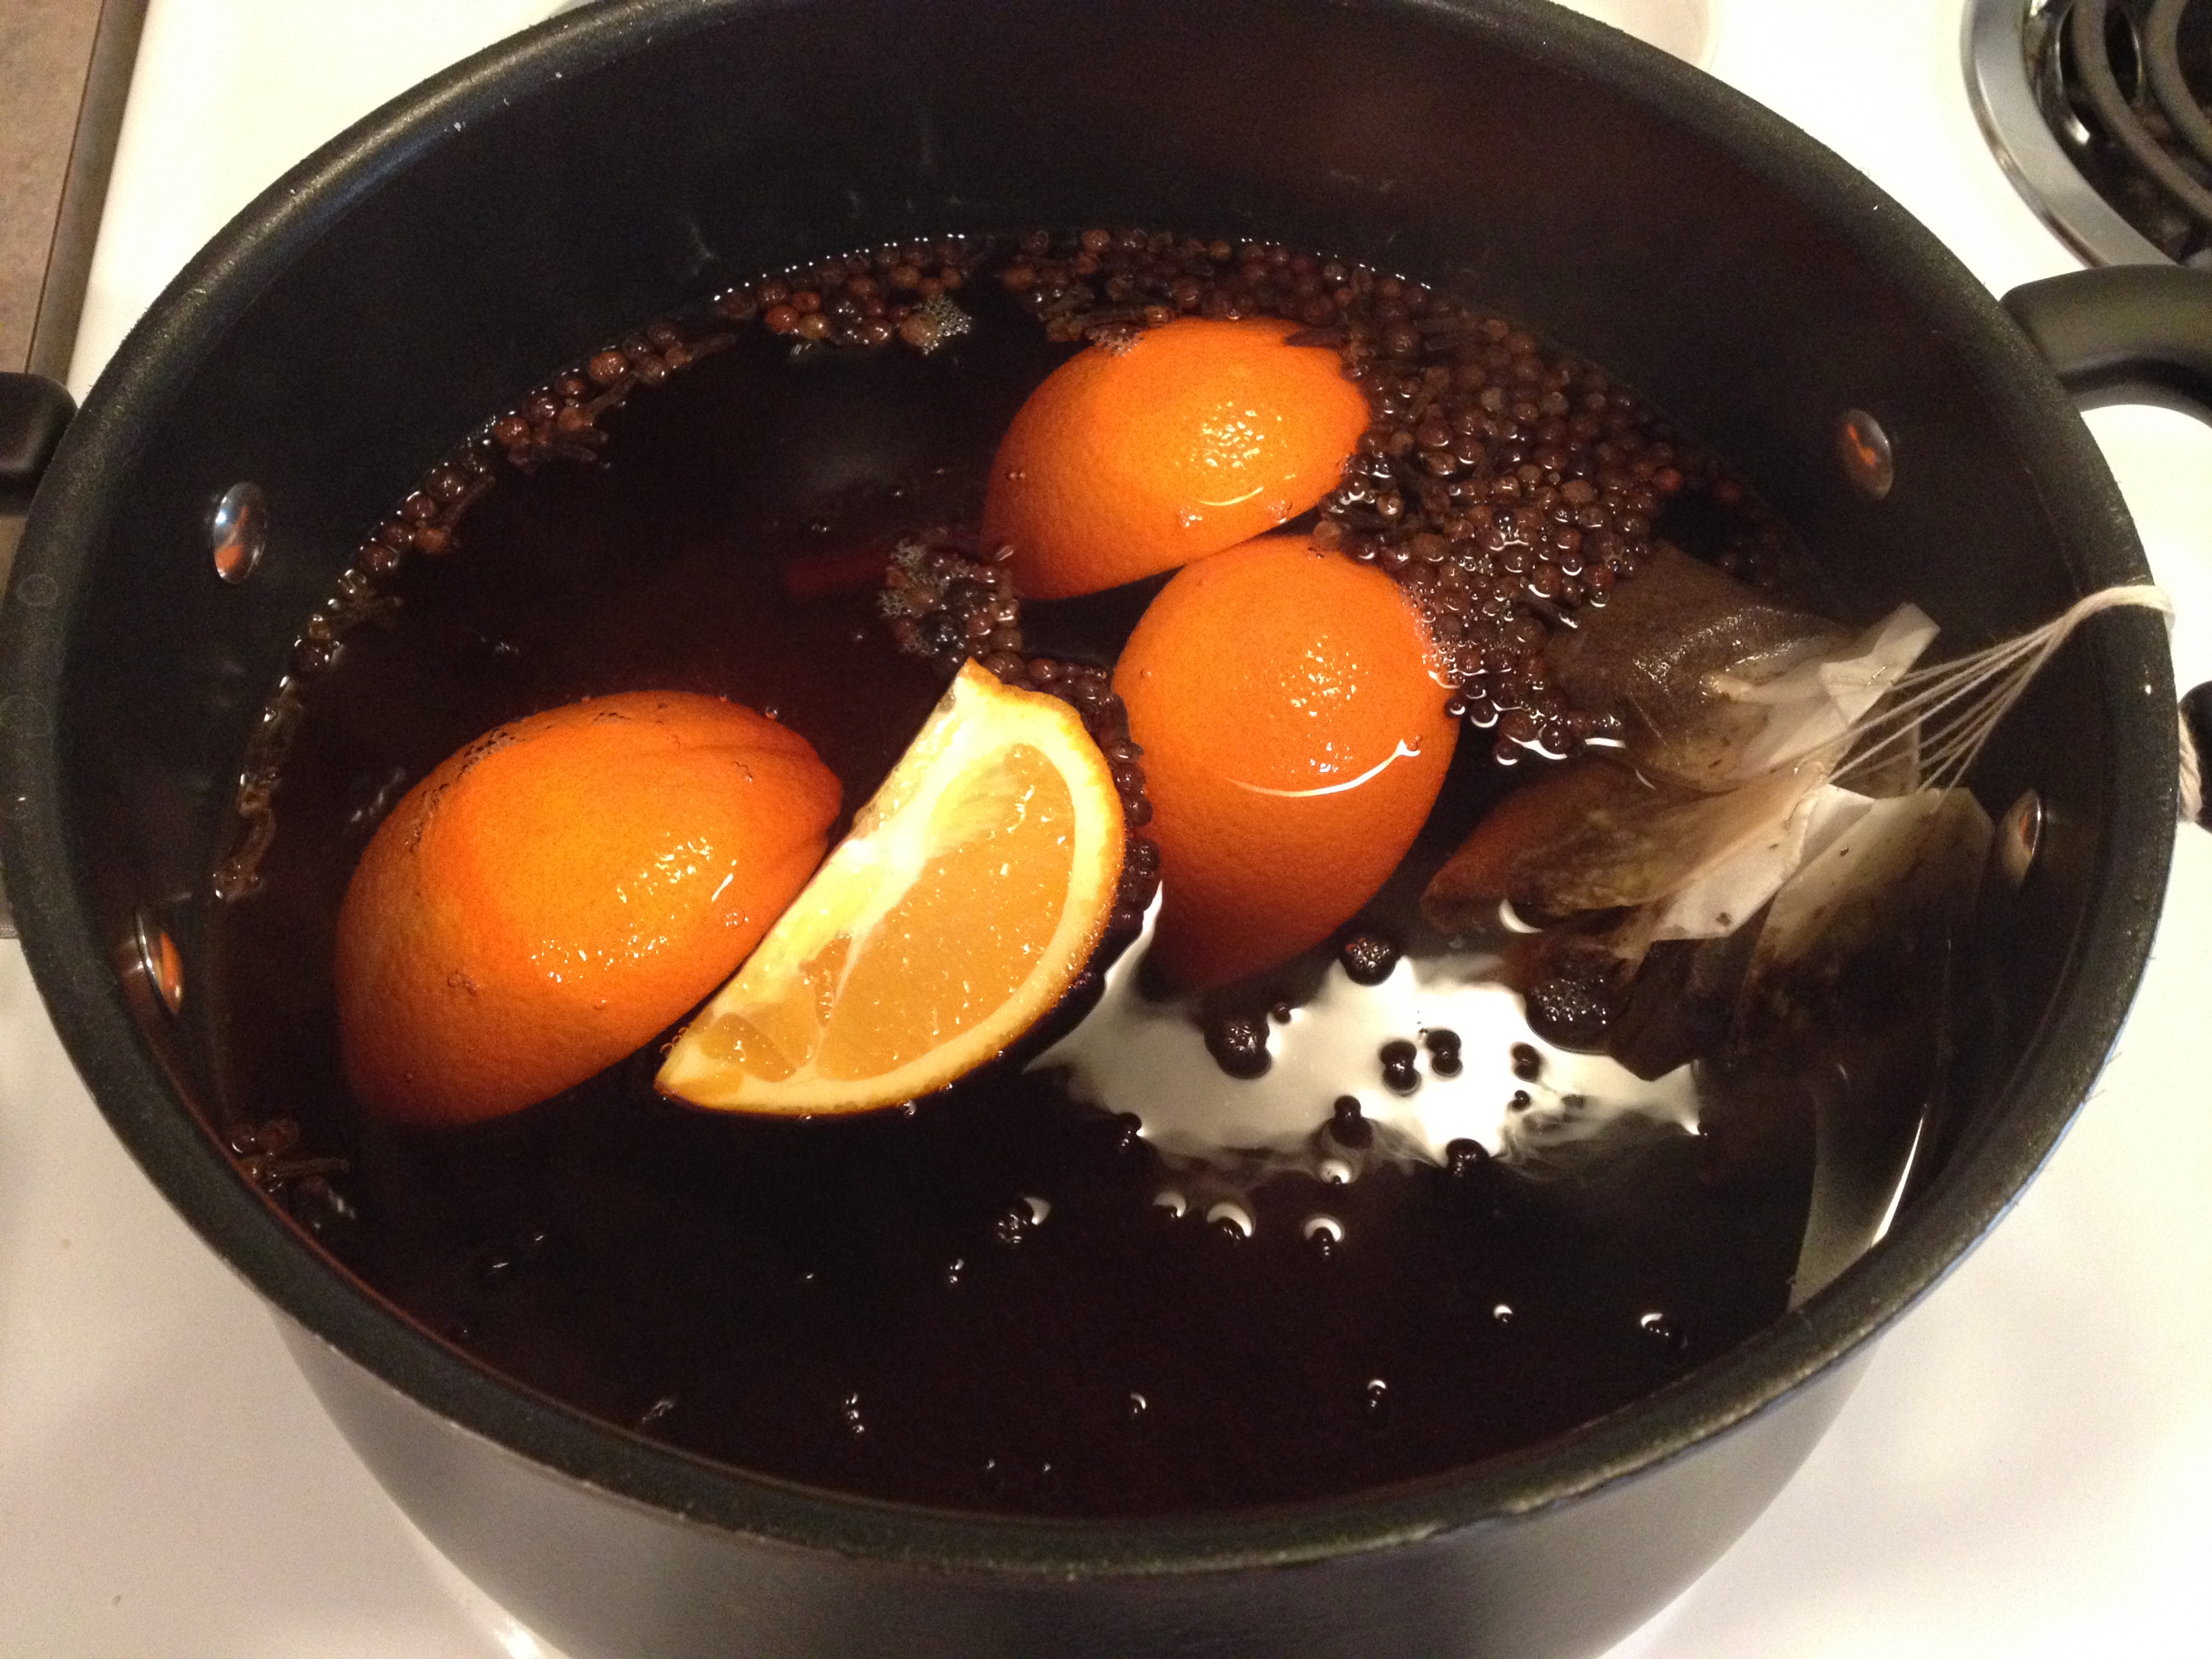
Crock Pot Mulled Hot Apple Cider

INGREDIENTS:

  • 1 Gallon fresh apple cider
  • 1/4 C. brown sugar
  • 1-2 tbs. whole allspice
  • 1-2 tbs. whole cloves
  • 4-5 whole cinnamon sticks
  • 1/2 orange, cut into wedges (optional)

DIRECTIONS:

  1. Throw everything together in a crock put on high
  2. Once it’s hot, turn it to low and let it brew for at least an hour.
  3. Serve hot. Folks can ladle into mugs from the crock pot, or you can forego the crockpot altogether and use a pot on the stove before transferring to a carafe.

Hot cider is a treat in any season, but it makes your house smell like amazing fall and winter things.  It’s such a comforting, warm beverage, and let’s face it… who doesn’t like cider?  For an adult Halloween party, you could even gussy it up with a little of your favorite poison… caramel flavored vodka would prevent it from being super-obvious, and then you’d have amazing caramel apple spiced cider with a little twist.  If you prefer a stronger, more present “threat,” Bourbon, Rum, or Brandy would also work well.

Note: images of caramel apple dip and pumpkin bundt credit to Google Images.

Superfood Summer Salad

photoNow that Liz and I have dabbled a little in the world of vegetarianism, we’ve discovered some things that are really, truly, fabulously tasty and extremely healthy for your body.  In fact, having only began this change 4 days ago, I’ve already lost almost 5 pounds.  That’s insane.  And awesome.  Needless to say, so far I have NO regrets about the change, and I feel great.  Also, we’ve really sort of bonded over some of the amazingly tasty things we’ve eaten so far.  This particular recipe is my lunch this afternoon (chowing down as I type this), so Liz hasn’t even tasted it yet.  I think it’ll be a pleasant introduction.

Since I’m sort of in the middle of several things today, this will be a somewhat brief entry compared to many of my others.  Mostly though, that’s because this recipe is not one of my own.  it comes Ambitious Kitchen, where I imagine I will probably venture for ideas on the regular now that I’ve tried this superfood salad.  She mentions the salad is great for lunch (I can vouch), or as a side for dinner, maybe alongside a nice grilled fish.

The salad is comprised of tons of veggie superfoods, like kale, spinach, quinoa, edamame, avocado, and a lemon vinaigrette that’s to-die-for.  Per usual, I did adapt a few teeny things, but not because I didn’t like any of the stuff that was in it already.  Any of the ingredients followed by a (*) are the ones that were adapted.  That’s primarily because the ingredients were either more readily available, or I had them in the fridge already.  You can compare it to the original recipe.  Here’s the rundown:

  • Quinoa
  • Kale
  • Baby spinach*
  • Cherry tomatoes
  • Toasted raw sunflower seeds*
  • Avocado
  • Mango
  • Edamame
  • Minced white onion*
  • Fresh garlic
  • Lemon juice
  • Olive oil
  • Sugar
  • Salt
  • Pepper
  • Basil

Un-Snooty Tip: Grilling Veggies

grilled veggies 1Fruits and vegetables provide key nutrients, vitamins, and other good-for-you things that are ALWAYS absent from processed foods, and they’re much easier for your body to digest.  They give your body the power to fight off disease, and they give you the energy you crave to be the superhero you always wish you could be.  We watched a documentary recently about the effects of red-meat diets on entire cultures of people, and it’s kind of shocking to find that places like China (whose diets used to mainly consist of rice and vegetables only) had almost NO cases of obesity or heart disease.  Places like the US on the other hand, where the average diet is almost completely dairy and meat-based, heart disease and obesity are a huge concern.  For those interested, get on Netflix and watch the documentary Forks Over Knives.  I highly recommend it.  Also, while you’re at it, check out Food Matters.  I’m not a full-blown vegetarian, but Liz and I are going to be experimenting with it for a while during the week, eating small amounts of meat on the weekends.  We’re curious to see how much better we feel, and how much weight we end up losing.  For those skeptics out there who would ask “how do vegetarians get any protein without meat?”  Beans. Nuts. Hummus. And for you non-vegans like me, eggs.  Next question?

grilled veggies 2So, I digress.  Many of us red-blooded Americans heavily associate the grill (that all-important summer cooking appliance) with MEAT.  Delicious, charred, smoky, wonderful meat.  When you smell the neighbor’s barbecue fire up, you probably don’t think about what kinds of veggies they’re grilling.  I can tell you though, because of lots of things I’ve experimented with lately, veggies are now one of my favorite things to throw on the barbie.  Not only are veggies better for you than meat, but they’re (usually) more ethical also.  Here are my tips for making excellent veg.

  1. Get some heavy-duty foil or a couple disposable foil pans.  Makes for quick and easy cleanup and maximum ease during the cooking process.  All you have to do is throw everybody together in the foil pan (or make a foil packet), throw it on top of the grill, and let it go.  Obviously stirring every once in a while is a must.
  2. Pick veggies that will taste good together.  Really, the possibilities are endless.  Below, I’ll list a couple of possible combinations and pairings to get your creative juices flowing.
  3. Cut all the veggies into pieces of a similar size.  This will help them cook evenly and at around the same amount of time.
  4. Season with whatever combinations of spices you like.  You could do up some southwestern veggies, with cumin, paprika, cilantro, lime, cayenne, and garlic.  Or, you could do something Mediterranean with coriander, lemon, garlic, oregano, salt, and pepper.  I can tell you though, surprisingly enough, that no matter the flavor profile you choose, a dash of soy sauce makes it all taste amazing.  Another secret ingredient: a dash of sugar.  Really.
  5. Once you’ve got your veggies and seasonings selected, Toss them together in a big bowl with s couple tablespoons of olive oil, making sure all the pieces are coated.  This helps things not to stick and burn too badly– although you want a little caramelization to happen.  That’s kind of the point of the grill, right?
  6. I never measure seasonings.  Many people insist on measuring, but I have never had an issue.  All I do is put an even sprinkling of each seasoning over the top of all my veggies while they’re still in the bowl and stir it all in.  You can always adjust the salt once they’re done if you want more.
  7. If you have access to a charcoal grill, it’s preferable because the flavor is so much more awesome.  However, a propane grill also gets the job done.
  8. Adventure into fruit grilling territory also.  Fruit has high contents of natural sugar, so it’s awesome combined with high levels of heat.  You get the nice brown caramelization, and it’s wonderful.  Just combine it with a little brown sugar and cinnamon, and you’re good to go.  Maybe also consider adding some vanilla fro-yo.

Here are some great combos of veggies and seasonings for you to experiment with at home.  All of these are great as side-dishes, but can be adapted to be served as paninis, wraps, and many other tasty things! (spoiler alert: one of these coming soon in a recipe!)  I have tried each of these, and I promise they each rock.

  1. Straight-up zucchini:  Just a simple zucchini on the grill with some olive oil, garlic powder, salt and pepper.  Tasty, quick, simple, and healthy!
  2. “Godfather’s Choice”: Red and green peppers, onion, mushrooms, and zucchini cut in coarse, bite-sized pieces with garlic powder, salt, pepper, basil, and oregano.
  3. MediVeg Delight: Broccoli, onion, chopped tomato, mushrooms, red pepper, and zucchini all diced with soy sauce, cumin, coriander, garlic powder, basil, oregano, salt, and pepper.
  4. Corn-on-the-Cob: This can be done in many ways.  This is how I would do it: soak several ears of corn in water for about an hour.  Remove from water and wrap in foil.  Then grill them on medium-high heat for about 10 more minutes.  Serve with herbed butter: take 1 stick of room-temperature butter and mash together with 1 tsp. garlic salt, 1/2 tsp. dill, and 1/2 tsp. paprika.

It’s time to get creative.  Let me know if you have any combinations I need to try, I’m totally looking for ideas.  Grill away, Un-Snooty friends!

Pumped Up Polynesian Pig Pizza

PizzaAloha!  I’ve been on kind of a pizza kick lately.  For instance, the other day, we made a pizza with pesto, caramelized onion, mushrooms, prosciutto, mozzarella, and arugula.  That was some TASTY business.  THIS pizza was also insanely awesome.  How could it not be, with a name like “Pumped Up Polynesian Pig Pizza?”

This was a bit of an experiment a month or so ago, since I had pizza dough to use and I was ready to get creative with a new pie.  Liz loves Hawaiian pizza probably more than any other kind, so I decided to go in that direction.  When I think about the different kinds of hawaiian pizza we’ve had from different places, a lot of them seem kind of boring.  A lot of times it’s literally just cheese, ham, and pineapple.  Which, you know, whatever.  It’s going to taste good however you slice it.  But I got to thinking, there are so many more creative things I could add to this!  My brainstorm took me from a simple ham and pineapple pizza to a pizza that included all kinds of trimmings:

  • 1 medium onion, sliced and caramelized (see below)
  • 1/2 green bell pepper, diced and sauteed
  • 2 cloves minced garlic
  • 1/2 pre-cooked and packaged ham steak, diced
  • 1 C. fresh diced pineapple
  • 1/4 C. fresh cilantro, chopped
  • 1-2 C. shredded Mozzarella cheese (or pizza blend, mozzarella and provolone)
  • 1/4 C. crumbled Feta cheese
  • 6 strips cooked, crumbled bacon
  • Tony Chachere’s Creole Seasoning
  • Olive oil
  • Marinara sauce
  • Butter
  • 1 tsp. sugar
  • Pizza dough (for dough recipe, see: Mexican Chipotle Chicken Pizza)

So here’s how this goes.  There’s a good deal of prep to be done, and it’s a little time consuming, but it’s worth it, I promise.  Here’s the way I would do things.

  1. Preheat the oven to 400.  After you roll out your dough and get it onto a sheet, you’re going to need to prick it all over with a fork and brush a little olive oil on it.  At this point, also season it around the edges with the Creole seasoning.  You won’t be sorry– Cajun crust is awesome.  Just bake the dough part-way, for about 5-8 minutes until it’s partially baked and the sauce won’t make the dough soggy.  Once you take it out of the oven, crank the oven to 500 degrees.  Not kidding.
  2. Slice your onions into ribbon-like slices.  With a tablespoon or two of butter, sautee them on medium (or just under medium) until they’re soft and a little transparent.  Then, add the 1 tsp. of sugar and stir.  Continue cooking until they’re nice and brown all the way through (this takes quite a while, so leave them alone a little and prep your other veggies).
  3. Sautee green peppers with a little oil and salt.  When they’re pretty tender, throw in the diced ham and minced garlic.  Just let that sweat together for a minute or so.  Remove that from heat and set it aside.
  4. Spread a layer of marinara over your prepared crust.  You can use however much you like; I happen to like a little less sauce. Sprinkle some of the mozzarella over top, not a lot. Then, top with caramelized onions, sauteed peppers/ ham, feta, more mozzarella, bacon, and pineapple.
  5. Bake it off for about 10 minutes in the 500 degree oven, or just until the cheese is all melted and starts to brown slightly.  Remove it from the oven and top with the fresh cilantro.  You could also elect to save some of the pineapple for after the baking process, as it will retain more of its “fresh” sweet flavor.
  6. Enjoy it, yo!

Summer 2014’s Cleaner Eating Guide

marketGreetings!  It’s (finally) spring!  That means it’s time to start thinking about summer and ways to trim down, buff up, and generally feel better because winter is FINALLY nigh and let’s face it, you want to look good for the beach.  Liz and I collaborated on this guide.  It’s the sort of stuff we like to do to guide our eating habits, especially after a long, harsh, fatty fat winter.  We think these tips are great for folks who aren’t great with dieting (and who is?), and just “like what they like.”  Let’s get started, shall we? 🙂

Good Rules of Thumb

  1. The better you can pronounce the ingredients in the list/ know what they are, the better the food item is for you. A long list of unknown ingredients = a lot of preservatives and additives that your body can’t digest and doesn’t know what to do with. For instance, foods like frozen meats/hot dogs often have tons of preservatives and carcinogens in them. Fresher is always better.
  2. When possible, eat organic.  It is more expensive.  It’s also more ethical.  Organic for veggies and fruits means no pesticides, and no GMO’s.  Organic for livestock means ethically raised (usually free-range) and on clean diets.  This all means less of a chance for you to get sick in the short and long-term!  Also, because organic products are free of preservatives, it means most of them are going to come from local sources.
  3. Stay true to the serving size listed in the nutrition facts. Portion control is important. Eating until your stomach says “no more” is not a good idea. It means you’re always getting more calories than your body needs to function and you actually waste energy trying to metabolize all that food and burn the calories. This means you get tired quicker because you’re not only using energy to function, but your body is using energy to burn the food you ate. Plus it makes you feel bloated and full and it’s harder to breathe, which is never fun.
  4. A green vegetable with every meal (ideally not cooked beyond recognition or incorporated into a casserole.  The more raw the vegetable, the more benefit you get from its vitamin and nutrient content).
  5. Avoid eating before bedtime.  You don’t need the extra calories, especially since you’re just going to be sleeping.  You might think you’re hungry, but your “asleep self” won’t notice, and you can eat when you wake  up.
  6. Don’t think of eating healthy as “being on a diet.”  That’s a surefire way to not stick to it.  Being on a diet is a temporary thing, where being healthy is a lifestyle.
  7. Get in lots of fiber– this helps keep you regular (obviously) but also keeps your body getting rid of toxic things it doesn’t want or need.  A high-fiber diet, like a high-protein diet, will help you lose weight.  Whole grains and lots of beans are a good place to get extra fiber.  A lot of the recipes we make regularly have black beans or garbanzo beans (hummus is straight up bean paste).  Plus beans are a good source of protein, which gives you energy.
  8. Try to do something physical every day, no matter how small. At least 30 minutes is ideal.
  9. Substitute water for soda/juice/flavored teas/etc. as much as possible.  Pop (and lots of juices) isn’t good for you for lots of reasons, mostly because it’s packed with artificial sugars and other chemicals that your body doesn’t need and doesn’t know what to do with.  One every once in a while is better than several every day though.  A lot of times, juice isn’t good for you, but hides behind being juice.  It’s just as full of sugar and calories as pop, lots of times.
  10. Take a multivitamin every day.  You’d be surprised at how many vitamins are missing from our usual eating habits.  B vitamins help metabolize food, and vitamin C helps to promote immune system health.  Vitamin K is great for your blood, and there are tons of other vitamins you need.  Also vitamins have been shown, in some cases, to prevent, stop, and sometimes reverse cancer.
  11. Condiments can add hundreds of extra calories to a meal. Limit them when possible, and substitute creamy dressings/condiments with oil-based ones as much as you can (Italian over ranch on salads).  Look at the calorie content in each serving of dressing or condiments and stick to the serving size if possible.  Condiments like guacamole, hummus, and pesto (watch it with pesto though, the oil/ fat content is higher than in guac and hummus) are better for you than mayonnaise, ranch, barbecue sauce, and ketchup, because their ingredients are natural.
  12. You don’t have to give up carbs, but when you do eat them try to make them whole wheat when you can. Especially in the store, nearly everything has a whole wheat option that tastes pretty nearly as good as the “white” option. Even at restaurants, many places now offer whole wheat/ brown rice or pasta options. it’s easy to get fooled though, at least with bread. There’s REAL wheat bread, and then white bread that’s disguised to look like wheat bread. The first ingredient will always be “Whole wheat flour” if it’s actually whole wheat, NOT enriched flour.
  13. Don’t be afraid to branch out from what you know and try new things. Some things may seem new/different/scary, but once you learn what new things you like, a whole bunch of new possibilities open up.  Liz and I like mexican and mediterranean foods a LOT so we make lots of different kinds of food with those kinds of ingredients.  We have tried a lot of things we didn’t like, and because of that, we stumbled on lots of things we DO like.  That’s what experimentation is: Finding a bunch of ways NOT to do things so you can find the thing that works.

Great Websites for Tools & Reference

  • www.skinnytaste.com – Lots of easy to follow recipes, healthier remakes of classic favorites (Macaroni and cheese, pizza, etc.) but also lots of creative new recipes that are outstanding.
  • http://www.helpguide.org/life/fast_food_nutrition.htm
  • http://www.healthydiningfinder.com/ – You don’t have to give up fast food/restaurants, just order the better options. For instance, instead of ordering a burger at Wendy’s, get a baked potato or salad and chili. At McDonalds, instead of a crispy chicken sandwich, get a grilled version.  Also, stay away from fries whenever possible.  Most fast food places now have healthy side options like apples.  Most fast food breakfasts offer yogurt or fresh fruit instead of hashbrowns.
  • www.myfitnesspal.com – Sometimes we trick ourselves into thinking we are eating healthier than we actually are. We think we are consuming 1,500 calories, but by not keeping track we’re sneaking in 1,000 extra calories and hitting 2,500. Myfitnesspal has an app and a website, and logging calories/exercise can really help keep you accountable/let you see if you’re reaching your goal. It IS time consuming, but it works. And after a while, you just get used to doing it.
  • www.pinterest.com – In the search bar on Pinterest, take your favorite recipe and add “Healthy” in front of it. You’ll get a list of hundreds of “lightened-up” versions of it.  Some of them aren’t great.  Some are awesome.  Use your judgement to decide on a version you will enjoy.

Eat This, Not That

  • For carbs, try to stick to these.  Whole wheat pasta instead of regular pasta.  Brown rice instead of regular rice.  Whole wheat or whole grain bread instead of white or enriched flour bread.  Quinoa instead of couscous or white rice.
  • Chicken and fish more often than beef and pork – these are all good, grillable options.  Salmon is great for you, has lots of omega 3’s and fatty acids your body needs, and it’s good for your heart.  All kinds of fish and chicken have nearly unlimited ways you can prepare them.  Also grilling is fast, easy, and tasty all through the spring, summer, and fall.  I try to do it as much as possible, because it’s also healthier.
  • Clear-based condiments instead of creamy condiments – particularly on salads.  Salad isn’t healthy anymore once it’s covered in ranch, croutons, and cheese.  There are tons of varieties of vinaigrettes that go with nearly anything you could possibly think of to put into a salad.  One of our favorites is a spinach salad with candied pecans, dried cranberries, feta cheese, granny smith apple, and a raspberry cabernet vinaigrette from Marzetti’s.  Also, you can easily make your own dressing by mixing red wine vinegar and EVOO with some spices (basil/ oregano, salt, pepper) for a really simple dressing that tastes really good.
  • Fruits and vegetables instead of carb-based side dishes (pastas, rices, etc. ALSO, potatoes and corn are both starches, NOT just vegetables. So mashed potatoes/baked potatoes/corn shouldn’t be the staple vegetable, as they’re full of starches).
  • Water instead of sugary drinks (iced tea with minimal sugar/ flavoring isn’t terrible, but too much coloring/ caffeine can cause kidney stones)
  • Nuts, fruits, vegetables; whole wheat pita chips and hummus; light popcorn; rice cakes as snacks instead of chips/cookies. We keep roasted almonds around… I like the cocoa ones and the smoked ones.  Also, we have whole wheat pita chips and hummus in the house at all times because I love it.  We NEVER buy little debbies or potato chips, and even a lot of trail mixes and granola bars are not actually good for you, because they’re full of unnatural ingredients, sodium, and added sugars.  Also, we eat chocolate rice cakes with peanut butter spread on them for dessert a lot.  Peanut butter has some good fats and a little protein, but a lot of sugar too; be careful how much you eat.  The serving size is 2 tablespoons, which is plenty.

Recipes We Like

Crock Pot Chicken Tacos – chicken breasts, salsa, and spices go in the crock pot for 2 hours on high, then you just shred the chicken, mix it all together, and serve it on flour tortillas with the usual taco acoutrements!  Delicious and easy.  Watch for the recipe to be posted soon.

Crock Pot Mexi-Chicken – Same as tacos, plus a block of reduced fat cream cheese, a can of corn (drained) and a can of black beans (drained).  Then serve it over brown rice (minute rice makes it) with salt and lime juice (I add chopped fresh cilantro, which is an acquired taste… but you have to try it to like it).  This is one of Liz’s favorites.

Southwestern Black Bean/ Quinoa Medley – a recipe from Skinnytaste.com, it’s very mexican tasting and just really freaking good.  Lots of bold flavors.  Watch for my post on this soon.  You can make this a day or two ahead and eat it for lunch for several days.  It would be an awesome addition to any cookout, too!

Grilled Mesquite Chicken Breasts – buy a packet of McCormick’s mesquite marinade (I keep several around all through the summer).  All you have to do is mix it with water, juice, broth, beer, or a combination of those, and soak pierced chicken breasts in it for a while.  Then grill it and serve it with a green veggie. Seriously, I think I might make these tonight.

Cauliflower Mash – it doesn’t taste like mashed potatoes.  It has a similar texture, but don’t eat it expecting it to replace or taste like mashed potatoes.  While it is a great and healthier alternative to mashed potatoes and a variety of other starchy sides, it’s more like another way to eat cauliflower (and it’s especially good if you’re not a huge fan of cauliflower, which I am not).  All you do is steam the cauliflower until it’s very soft, drain it really well, mash it with butter (only a tablespoon or a little more), salt, and two chicken bouillon cubes.

Green Veggies – sauteed green beans (see post on Green Beans Almondine), grilled zucchini, broiled brussels sprouts, grilled asparagus, steamed broccoli, raw baby spinach (I don’t like it cooked), and recently kale chips.

Kale Chips –  they’re super tasty… and if you like crunchy, salty stuff (and who doesn’t?), you’d be surprised that you will probably like them.  Look for my post on how to make these tasty little morsels soon!

Asian Persuasion Stir-Fry – pick your favorite veggies (red/ green/ yellow peppers, zucchini, onion, mushrooms, broccoli, etc.) and cook in a little sesame oil and olive oil until they’re tender.  Add in some scrambled egg, minced garlic, and some chopped peanuts.  Then, top it off with a little bit of honey, soy sauce, and some ground ginger.  If you wanna, garnish it with some toasted sesame seeds.  You can serve it over rice or rice noodles.  Delicious!

Brined Pork Chops

photoEvery year, we have pork and sauerkraut on New Year’s Day for good luck in the following year.  Not sure exactly how the tradition originated, but I assume it’s a German thing (since my family is German).  However, my uncle and cousins aren’t big on the ‘kraut, so we always have pork chops for them to eat.  This year, along with my green beans almondine, I made brined and oven-baked pork chops with a spice rub and topped with a slice of apple.

Gone are the days when you made a pork chop that turned out tough and dry.  A brine is a great way to ensure a juicy and flavorful (and tender!) pork chop, so why would you skip on this quick and easy step ever again (peer pressure)?  If you’re not familiar with it, brining is a technique you can use for several different kinds of meat, but it basically draws moisture and seasoning into the meat and provides for juicy and tender meat that cooks quickly.  You also don’t have to soak the meat for a very long time, which is great if you’re pressed for time.  Throughout the summer, I use the technique for grilling pork chops with a mesquite rub on them, and I have yet to have a bad result.  Here’s the process– for every cup of liquid you use, add 1 tbs. of salt, and 1 tbs. of brown sugar.  So, you can have anywhere from 3-100 cups of liquid, as long as you use 3-100 tablespoons of salt and brown sugar.  The only situation I could think of in which you would need that much brine would be if you were brining a very large piece of meat (like a whole rack of ribs, or a whole turkey).  Many people have produced great results brining a whole turkey and roasting it in the oven… I would really like to try it.  Anyway, this is a recipe for 6 boneless pork chops.

BRINE:

  • 3 C. warm water
  • 3 C. apple juice (optional– you can just use 3 more cups of water)
  • 6 tbs. salt
  • 6 tbs. brown sugar

SPICE RUB (you can adapt this to taste however you want, or use a pre-packaged rub):

  • dried mustard
  • seasoned salt
  • paprika
  • garlic powder
  • marjoram
  • thyme
  • 1 large apple (I like honeycrisp) sliced width-wise into 6 –  1/4″ slices.  Substitute pear slices if desired.
  • 6 tsp. brown sugar

Dissolve the brown sugar and salt in the warm water, then add the apple juice.  If you’re not using apple juice, just use 6 cups of warm water to dissolve the salt and brown sugar.   Remove the THAWED (but cold) pork chops from package, and perforate with a fork.  Soak in the brine for 15-30 minuted.  You may refrigerate during this time if you choose.

Remove from brine and pat dry with a paper towel.  Sprinkle one or both sides of the meat evenly with each spice on the list, then rub it in with your hands.

On high heat, in a large, oiled, skillet, quickly sear both sides of the meat to seal in the juices.  Remove from pan, and place on a baking rack on top of a cookie sheet (to catch pan drippings). Top each with an apple or pear slice and then 1 tsp. of brown sugar.  Cover loosely with foil.

Place in a 400 degree preheated oven for about 15-20 minutes, or until meat is cooked thoroughly (140-145 degree internal temperature with a thermometer).  I cheat, and cut into the chop to check.  This will, however, release juices from the chop, so don’t do this to all of the chops.  Move to a serving platter, pour pan drippings over the chops, and tent with foil.  Allow the chops to rest for 5 minutes before serving, as they will continue to cook from their internal temperature.

Enjoy!

Sausage Cheddar Breakfast Cookies

sausage cookies

This is another one of those posts that includes 2 recipes in one.  Not only do you get the cookies, but traditional sausage balls as they’re known in their original form.  Be excited!!

Over the years, some of my favorite Christmas memories include the things that happen in the morning on Christmas day.  Nothing ever could beat the feeling of waking bright and early with sleep (restless sleep at that) still in my eyes and head, and wearing my Christmas PJ’s out into the living room to find our tree, towering and twinkling, protruding from the mount of offerings left by the mysterious jolly elf clad in red and white.  My sister and I could hardly ever prevent ourselves from at least tearing into the stockings before breakfast and the recitation of the Christmas Story.  And Breakfast.  That was one of the things I remember most, because the smells would enthrone our whole house, and it was the one time during the year when we got to eat breakfast casserole.  And this wasn’t the only thing we would eat all day, by a long shot.  There was a fountain of candy that seemed to have sprung from a well deep somewhere underneath our house that probably ran through a pipeline all the way up to the North Pole.  And the Christmas cookies, which Mom had spent weeks making (and making us help her make), which explained why we had to annex the downstairs freezer just to hold all the overflow. And then Christmas dinner.  And dessert. And leftovers.

My wife had traditions too, which often included many of these same things.  I get to experience some of those this year, as we’re spending Christmas with her dad for the first time since we got married.  For her, though, one of the things she loved best was sausage balls.  I understand why, because it’s like if breakfast and finger foods had a baby, that’s what you would get.  And finger foods are great, because you can eat one at a time until you can’t.  And then you wonder how you got so full, because you only had one at a time, and it seemed like you hadn’t eaten that many (plus when you eat things one-at-a-time, the calories don’t count).  We’ve all been there, and continue to go there every holiday season from football season until after the New Year.  By the way, cookies work the same way.  Her dad has his own way of making sausage balls, and they’re pretty great, I have to say.  It’s also pretty easy, and all you have to do is mix it well, form it into balls on a baking sheet, and bake it for 15-17 minutes in a preheated 350 degree oven.  This is his recipe.

  • 2 C. Pioneer Brand baking mix (same as Bisquick, to my knowledge)
  • 1 lb. hot ground sausage (unbrowned)
  • 1 lb. block extra-sharp Cracker Barrel brand cheddar cheese, grated by hand

So, here’s my rendition of a favorite from both my childhood and my wife’s– it’s a nod to not only the classic sausage balls, but also the sausage breakfast casserole and the endless varieties of Christmas cookies that herald the holiday season every year.  They’re great for an office party, a tailgate or Superbowl party, or to share with your family on Christmas morning.  Also, this recipe yields about 4 dozen cookies.  This is a much doughier recipe than my father-in-law’s, which allows for a more cookie-like outcome.

  • 1 lb. Bob Evan’s spicy ground pork sausage (browned and drained)
  • 3 C. Bisquick baking mix
  • 1 lb. block extra-sharp cheddar cheese, grated by hand (got mine at Trader Joe’s)
  • 1 can Campbell’s cream of chicken soup
  • 1 can milk
  • 1/2 tsp. paprika
  • pinch of salt

DIRECTIONS:

  1. Preheat your oven to 350.
  2. Brown the sausage and drain off the fat.
  3. Mix the Bisquick, milk, soup, paprika and salt together.
  4. Fold in the sausage and cheese.
  5. Onto a greased cookie sheet, drop about 1 1/2 tbs. of the dough in rows about 1 inch or so apart.
  6. Bake in batches for about 25 minutes, until they begin to brown lightly on top.

NOTES:

You may opt to buy mild sausage when you’re looking at the many varieties of sausage options in the store.  Let me give you fair warning, though.  You’ll probably be sorry if you buy mild sausage, because it yields a pretty bland result.  The nice thing about sausage balls is that they have a little bit of a kick and a really nice flavor as a result of the spices in the sausage.  You’re going to want that in these cookies, too.  Also, note that included in both recipes is a 1 lb. block of extra-sharp cheddar.  My father-in-law used the Cracker Barrel brand, which may not be available everywhere.  The reason, though, that it needs to be in block-form is that pre-shredded cheese has less oil in it than the block does.  Also, pre-shredded cheese typically has a little bit of corn starch in it that keeps the shreds from sticking together and keeps it dry inside the package.  These are not qualities you want in these sausage balls/cookies.  Do yourself a favor and shred the cheddar by hand.

Eggnog & Rum Caramels

caramel 2Here’s a new one.  I’m pretty excited about these, particularly since I just recently ventured into the world of boiling sugar, and this is an accomplishment for me.  I was always kind of scared to try to make any kind of candy, because I knew I would inevitably screw it up.  It just seemed intimidating.  Then, because of the world of Pinterest, I stumbled across “Apple Cider Caramels” this fall, and went out and got a candy thermometer, because I HAD to make them.  Those turned out great and were a big hit at my Halloween party, so I got to thinking about what other flavors I could pair with caramel.

Eggnog goes with Christmas about as well as… any combination of two things that go together extremely well. I love it, and I always have to run and get some around mid-November when I can’t wait any longer before I start pulling out Christmas decorations and playing Christmas music (even though the radio hasn’t started playing it yet).  But what, besides Christmas, goes particularly well with eggnog? RUM.  …and nutmeg… of course.

I made a big ol’ batch of these and brought them to work, gave them to friends, and ate a bunch myself.  They were well-received, to say the least.  What better media to spread holiday cheer than eggnog caramels spiked with a little rum? 😉

  • 2 C. eggnog, divided
  • 1 stick of butter, cubed
  • 2 C. white sugar
  • 1/3 C. Karo light syrup (filled to the 1/2 C. mark with water)
  • 1/4 tsp. ground nutmeg
  • 1/4 tsp. cinnamon
  • 1 tsp. rum extract
  • 1/4 C. Captain Morgan’s spiced rum

AAAAAAND here’s how.

  1. caramel 1Stir together 1 C. eggnog, the nutmeg, cinnamon, rum and rum extract until well mixed.  Set aside.
  2. Line an 8×8 baking dish with greased parchment paper (cooking or baking spray works well)–make sure the edges are covered– and set aside.
  3. In a large pot, combine all other ingredients EXCEPT butter.  Stir and dissolve the sugar.
  4. Continue to stir over medium heat until the temperature on the candy thermometer reaches 234 degrees Fahrenheit.
  5. Remove the pot from heat, and slowly whisk in the mixture you had set aside.
  6. Add the butter cubes and whisk in until all is combined.
  7. Return to heat and continue cooking until the mixture reaches 248 degrees on the candy thermometer.
  8. Immediately remove from heat and pour into the prepared baking dish.  If any of the candy remnants cool slightly inside the pot, they will be a different consistency than the rest of the candy and should not be added to the candy in the baking dish (yes, learned from experience).
  9. Allow these to harden.  You can put them in the refrigerator if desired, though this is not necessary.  You can simply cover them and allow them to sit out overnight.
  10. Cutting time!  If you refrigerated them, you’ll need to let them come down to room temperature, or they will be too hard to cut/ will shatter. Remove the caramels from the dish (the parchment liner should have made this pretty easy) and lay the parchment over a sturdy cutting board. With a long, sharp knife,  cut them into whatever size pieces you want.  I cut them into log shapes because that prevented me from having to wrap a million tiny pieces.
  11. Cut a bunch of pieces of parchment to wrap your caramels in.  My batch yielded about 30 caramels the way I cut them.  When you wrap them, roll the parchment around the caramel and firmly pinch each end, twisting it away from you.  If you twist both ends in the same direction, you will be able to unwrap them by simply pulling each end.

Please enjoy these.  And not just by yourself, because that would be bad for your health, no matter how happy you were from all that caramel enjoyment.  Even more than all of that, Happy Holidays!

Russian Christmas Tea

christmas tea 2So far as I have observed, “Russian Tea” as it is known may not even really be Russian at all, but I’m not going to spoil the illusion.  We, as Americans, have a way of making our strange American pastimes and traditions seem more special by foreignizing them in some way; take for instance, French fries. Just because they’re not really French doesn’t make me enjoy them any less.  Similarly, even though I hear Trans Siberian Orchestra (and cringe) roughly playing music that used to resemble Tchaikovsky’s at Christmastime, I don’t enjoy the Nutcracker any less. So, even though this Russian Christmas Tea is more than likely a product of American imagination than anything that hints at Russian, I enjoy it all the more every Christmas (and my entire family begs me to make it every year!).

Russian Tea has become colloquialized in the modern gift giving culture of Southeastern America (apparently), as a dry mix for use as an instant hot beverage consisting of instant tea, tang, lemonade powder, cinnamon, sugar, and cloves.  While I do cherish the idea of a homemade gift to share with those you appreciate, I feel this particular combination sort of falls short of its potential.

When you think of Christmas and everything you love about it, some of the things that come to mind are probably tastes and scents remembered from years long past.  That’s likely because the olefactory is one of the strongest sensory details in terms of memory.  When you smell something familiar, the mental image of the first time you smelled it is likely to follow.  When you recall the happy times of Christmas past, you may think of turkey.  Maybe cranberry, douglas fir, sugar cookies, gingerbread, orange clove with cinnamon, hot chocolate.  So think about it.  With all of these wonderfully aromatic scents and flavors, why would you choose to annihilate your potential of creating a delicious seasonal beverage by making it out of Tang and NesTea?

christmas tea 1My solution?  Instead of making a big jar full of “fake tea,” make some big boy tea.  That’s the kind where you actually use some tea bags and hot water and make some tea.  Don’t use instant powders, because first off, they’re not good for you.  They’re loaded with “fake” stuff that was probably made in a factory (and not the olefactory, either).  My Russian Christmas Tea is made with black tea and mulling spices, then honey, brown sugar, oranges, and cranberry juice. Mulling spices, by the way, are often used around Christmas for various reasons– especially in the making of Wassail or hot mulled wine.  They consist of cinnamon, allspice, and cloves.  Did I mention mulling any kind of liquid makes your house smell amazing?  Well, it does.  Especially when you combine the spices with orange and cranberry.  So, might I suggest, rather than giving a dry mix away as a gift, make a big ol’ pot of the good stuff.  Then, I guarantee people will want to come to your place on Christmas Eve just to get their mitts on a big ass mug of your tea.  Here’s what I use.

  • 12 C. water
  • 8 Tea Bags (Lipton or Luzianne)
  • 1 can frozen cranberry juice concentrate
  • Juice from 1 orange (navel are good in the winter, as well as seedless and sweet)
  • Peel from 1/2 an orange
  • 3 cinnamon sticks
  • 1 palm-full whole allspice
  • 1 palm-full whole cloves
  • 1/2 C. honey
  • 1 C. white sugar

christmas tea 3First, you’re going to want to bring the water almost to a boil in a rather large pot with the tea bags dangling in.  Medium-high heat should get you where you want to be.  Then, bring it down to an even simmer (low to medium-low), adding in the cinnamon, allspice, cloves, and orange peel.  Speaking of which, I was at Williams Sonoma the other day and ran across this little doodad… It’s a mulling ball.  I am sincerely considering picking one up so I don’t have to strain the bits out of my mulled cider and Christmas Tea anymore.  Anyway, allow this to steep for about 20-30 minutes.  My recommendation, though, is to only leave the orange peel in the mix for about 15-20 minutes, as the pith (white part) from the orange peel can tend to give off a somewhat sour or bitter flavor.  You also don’t have to keep the tea bags in for this entire time– once the tea reaches a decent darkness (use your best judgement) you can remove the bags.  Add in the remaining ingredients and allow it to simmer for another 15 minutes.  Grab a large pitcher or carafe, and pour it from the pot, through a fine sieve, and into the carafe.  Serve hot.

Merry Christmas!

White Turkey Chili

photoDon’t have time to make dinner?  This takes about 20 minutes, give or take.  No more excuses!  I mentioned this chili in a previous post, when I said one of my favorite pairings is my Jiffy corn muffin hack with white turkey chili.  Since I’ve had a lot of requests for recipes that are easy and can be done in a crock pot, this was a natural next choice.  Also, many of my friends have enjoyed this chili over the last several years, and they’ve all been yelling at me to blog about it. 🙂  One thing, though.  I’m not just giving your the recipe, I’m giving you 3 recipes in 1.  You get the original version, with 2 other variations on the same thing.  Have fun experimenting!

This is not your mama’s chili, but as soon as you make it, your mama will want to too.  In fact, this is not my mama’s chili either– it’s my aunt’s.  She used to make this all the time when we all would come for family gatherings, and then finally I just bummed the recipe off of her.  I made it in college for my friends, and they were always insanely impressed.  What I didn’t tell them is how stupid easy this recipe is.  Now that Liz and I are married, her coworkers can’t wait until it’s her turn for soup day, because they know that means I’ll be making this to send in with her (even though I’m the cook around here, even she knows how to make this, it’s so simple).  It’s quick, easy, delicious, and filling.  Also, it’s easily adaptable and you can do about 8,000,000 different things with it.

Like the other chili I posted, this is not a traditional kind of chili where you have to use a hodgepodge of ingredients to get a great flavor.  You can adapt and add things though, if you like certain things that aren’t in there, or to get the level of spiciness you want.  My White Turkey Chili literally only has 4 ingredients. I’ll list those first, because I can tell you, this chili is outstanding with just these 4 things.

THE ORIGINAL

  • 1-2 lbs. ground turkey
  • 1 – 48 oz. jar (glass jar) Randall great northern beans
  • 1 – 16 oz. jar salsa of your choice (I use Pace mild, you can use whatever you want)
  • 1 – 8 oz. block of monterrey jack cheese, cut into small chunks

All you need to do to make a pot of the good stuff is to first brown the turkey in a large pot.  After that, you could then transfer the turkey to a crock pot, or you can continue in a regular pot.  If you’re going to have people over, you might want to go the crock pot route.  Next, throw everything else in and heat it until the cheese has melted.  You’ll need to stir a lot to get the cheese incorporated– everything should become thoroughly mixed, and the cheese will lighten the color of the soup.  Serve it hot, obviously, and with tortilla chips.

Now.  Now that I have told you how to make it with the basic 4 ingredients, let me give you 2 ways you can adapt it.  First off, If you’re making this for a crowd, you might want to think about making a little extra.  Also, when I went to the store this last time, they didn’t have the big glass jar of beans, so I had to improvise.  Here’s an extra large recipe, with a little something-something extra.

FOR A CROWD… AND WITH A TWIST

  • 3 lbs. ground turkey (I found a 3 lb. package at the store)
  • 4 – 15 oz. cans of great northern beans
  • 1 – 16 oz. block of PEPPER JACK cheese (see what I did there?) 😉
  • 1 – 24 oz. can of salsa of your choice
  • 2 cans of Rotel tomatoes and green chillies
  • 2 Tbs. ground cumin

The process is the same for this, just make sure you’re using a really big pot.  After you brown the turkey, season it with the cumin.  Then go about the rest, and just dump in everything and heat it until you can incorporate the chunks of cheese fully.  If you don’t want to make this much, just use the measurements for the original version, but add a little cumin and sub in the pepper jack.  Next up is the way my mother-in-law makes it.  It’s more like a chicken enchilada soup this way, but it’s just as easy and just as good!

MAMA ROSE’S CHICKEN ENCHILADA WHITE CHILI

  • 3 cans of chunk chicken in water
  • 1 – 16 oz. jar salsa of your choice
  • 1 – 8 oz. block of pepper jack cheese, cut into small chunks
  • 1 – 48 oz. jar Randall great northern beans
  • 1 – 15 oz. jar of corn
  • 2 C. chicken broth

The process is now even simpler, because you don’t have to brown any meat.  You just throw everything together and heat it until the cheese melts.  Enjoy!